Monday, December 21, 2009

A Confession

I have a confession to make.  Yesterday, I made brownies from a BOX.  I know!  How could I?! 

We had some weather yesterday, and I was, well, under the weather.  So while the rest of the fam shoveled us out, I whipped up some brunch, including brownies.  I did spruce up the box mix with some chocolate chips though. 

How did they taste?  Well, like brownies from a box.  They lacked the rich chocolaty goodness of my standards, and the texture was a bit puzzling, with the outside crisp and chewy, but the middle gooey and fudgy.  They got us through brunch though, and I didn’t have to feel like such a slacker for not shoveling. 

Monday, December 14, 2009

Beef Stew

Beef StewLast week, the average low temperature around these parts was 28°F. Not absolutely frigid, but not exactly warm either. This, my friends, is stewing weather.
 
I will confess up front, however, that I did not make any stew this past week. Nope. Not me. But I did eat some! Big T. made it, and he declared it his best beef stew in a long while, and perhaps his best beef stew ever. I will also confess right here and now that these pictures are not from Big T.'s best ever beef stew of last week, but rather from a beef stew I made last year. Yup, this post has been waiting a year to be written, and here I am.
 
And, I guess while I’m pouring my heart out, I should further confess that I really don’t like beef stew all that much.  Yeah.  Sorry, Big T.  Beef stew is a little too rich, too hearty, too…..masculine for me.  I just can’t appreciate the in-your-face meat-and-potatoes heaviness of it.  I like all of the ingredients on their own and in various combinations, but it seems when they are all dumped into the same pot, I just don’t enjoy it.  Therefore, when I’m making beef stew, I do a few things to cut the richness and overwhelming beef flavor.
 
I don’t really have a recipe for beef stew.  I think any logical combination of meat and vegetables works in some way, and I still haven’t found any amazingly earth-shattering mélange.  However, there are a few ingredients and a few techniques that I will apply to every beef stew I make. 
 
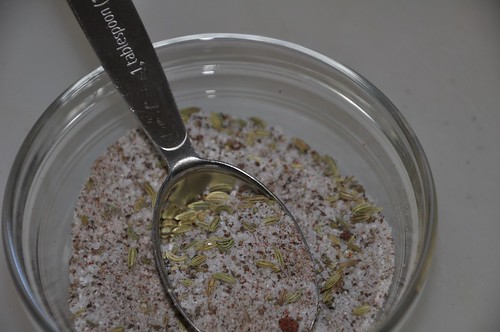
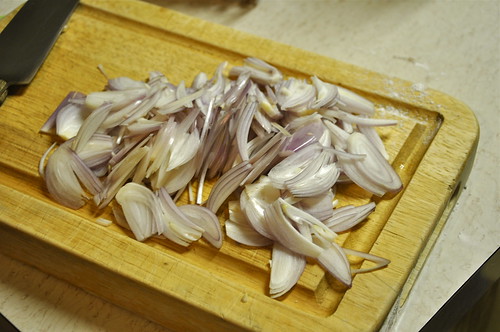
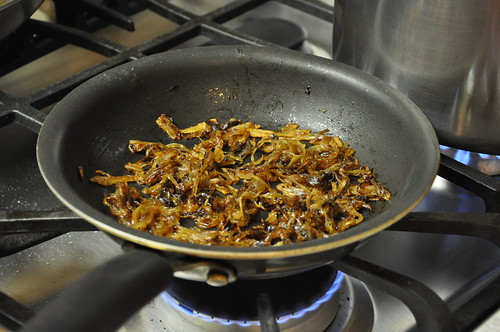
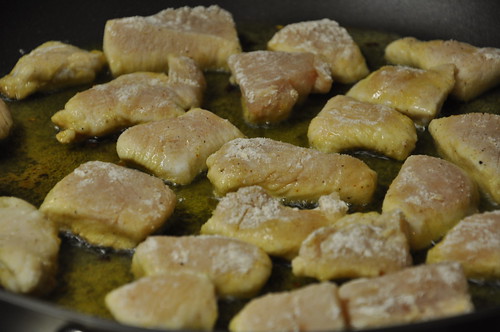
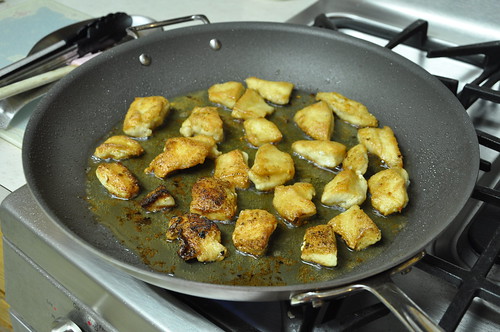
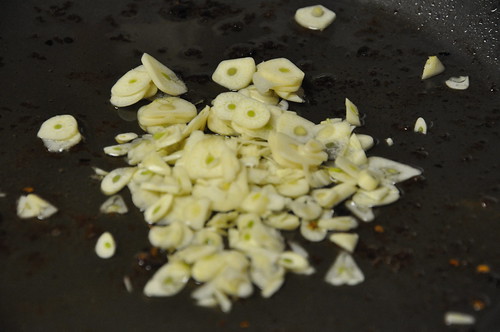
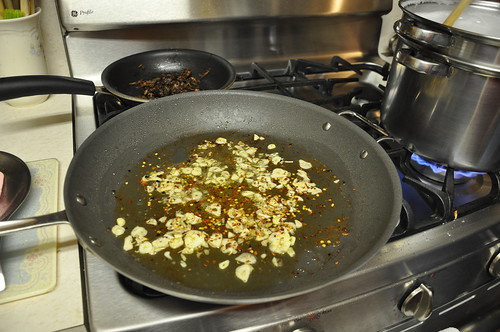
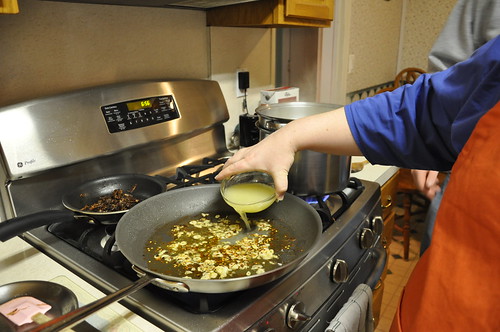
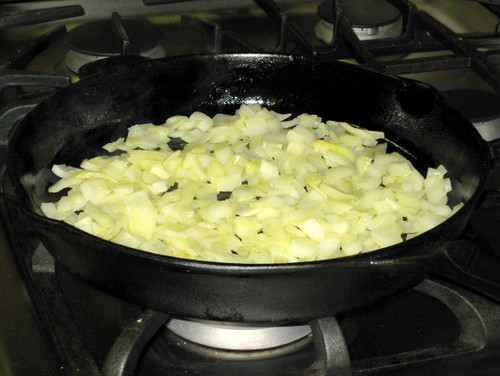
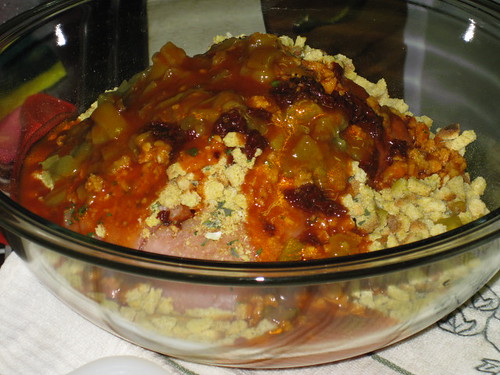
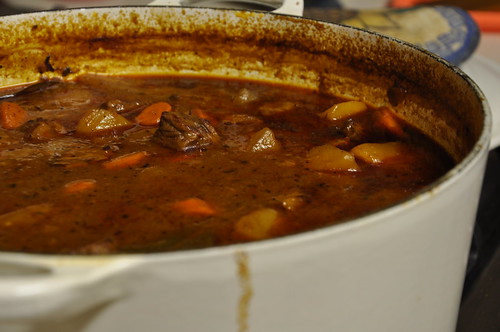
I start by trimming any excessive or hard fat from the meat.  The longer I plan on stewing, the bigger the pieces of meat.  I want them tender, but not stringy and devoid of all texture.  What kind of meat?  Ideally, chuck roast, but almost anything will work.  Then, I heat up some oil in a heavy Dutch oven (oven-safe).  I season the meat with salt and pepper, maybe a little garlic powder, and flour it lightly.  I brown it until it looks delicious and perfect, working in as small of batches as is necessary to accomplish this task.  Sometimes the browning alone takes nearly an hour.  I remove all the meat from the pan and then sweat some onion, garlic, carrot, and whatever other aromatics I plan on using for my broth.  Next, it’s time to brown the tomato paste.  Yep, tomato paste.  Always tomato paste.  There is no better way to add dimension to a stew or braise than with tomato paste.  It does some umami magic and stew without tomato paste isn’t worth eating.  (Again, sorry Big T.)  Once the tomato paste is a gloriously rusty shade of brick, I deglaze with some red wine.  This is essential.  It adds acidity and brightness to the overall dish, and a great fruity quality.  Yum.  The meat goes back in, and I add beef stock or, much more likely, water to cover.  Not too much!  Just cover the meat.  I add a bay leaf and maybe some thyme and bring to a simmer.  Then it goes in the oven.  You preheated your oven, right?  I like a temperature of about 250-275°F.  It doesn’t matter as long as it’s not too high.  I figure the stew will simmer at an internal temperature of 212°F-ish, but the oven needs to be a little warmer.  The great thing about stewing in the oven is that you don’t really need to stir.  I still do, every hour or so to make myself feel important, but there’s not really any risk of burning and the heat is infinitely more even than you can achieve on the stove.  I let the stew simmer in the oven for 2 hours or until the meat is just about at the desired level of tenderness. 
 
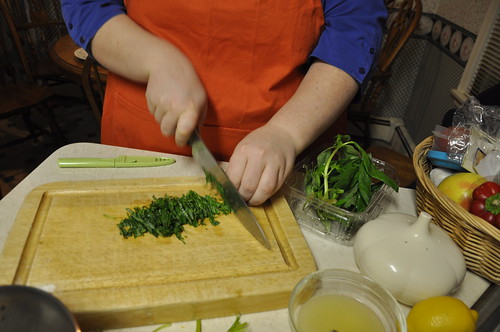
While the stew is….erhm…stewing, I cut up the vegetables I want in the stew.  The aromatics I added earlier will basically be mush and have given all their flavor to the broth.  I don’t really strain them out, but I do add some fresh stuff for textural reasons and for brighter flavors.  I pretty much always do carrots and potatoes, but sometimes add corn, string beans, peas, etc.  Put the vegetables in the pot when the meat is nearly done, add more liquid if necessary to just cover everything, and put the pot back in the oven. 
 
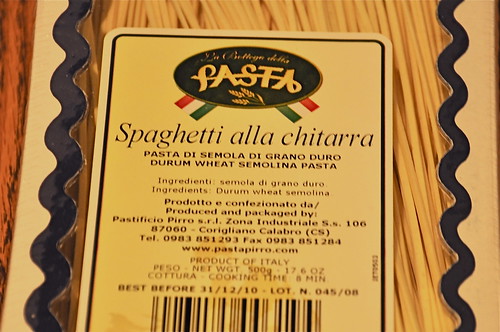
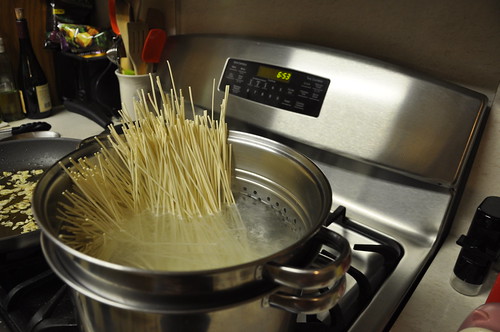
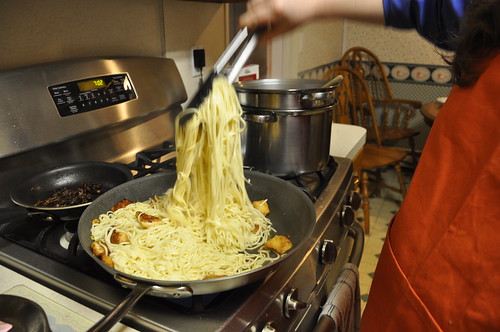
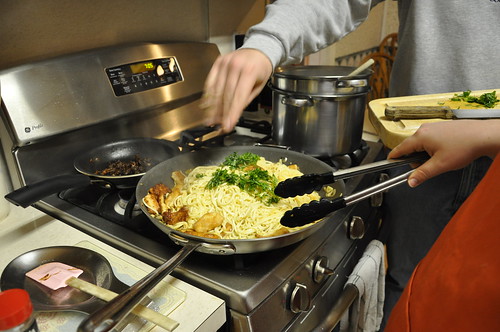
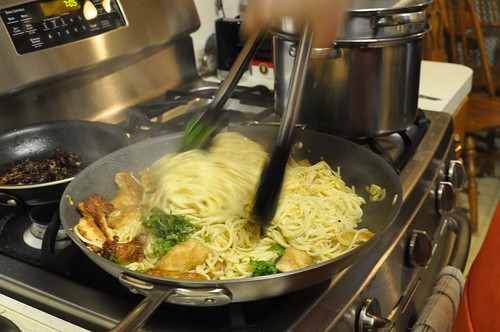
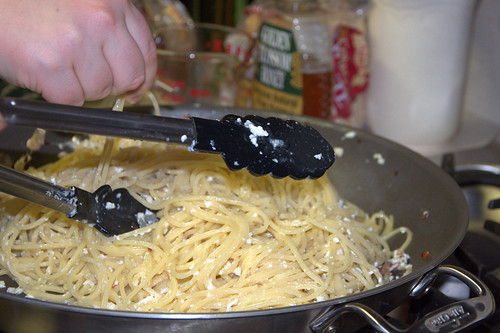
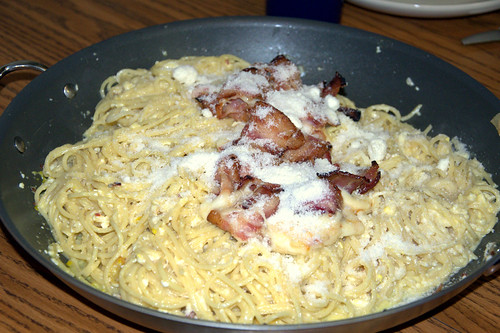
Next, and this is a requirement for me, fill a big ole pot with water and set it on high heat.  This, my friends, is for the EGG NOODLES.  Stew, for me, is mostly an excuse to eat egg noodles.  By the time the water boils and the noodles cook, the vegetables you added to the stew should be just about done.  If you want larger chunks of vegetables, you may need to adjust your timing for the egg noodles, but whatever you do, don’t forget the EGG NOODLES!  Big T. forgot the egg noodles.
 
If you wish, thicken the stew with flour or cornstarch dissolved in cold water.  Just mix a tablespoon or two with the water and slowly add to boiling stew.  Make sure to stir as you add your starch of choice.  I bet blending some potatoes would thicken the stew up too.  I should try that. 
 
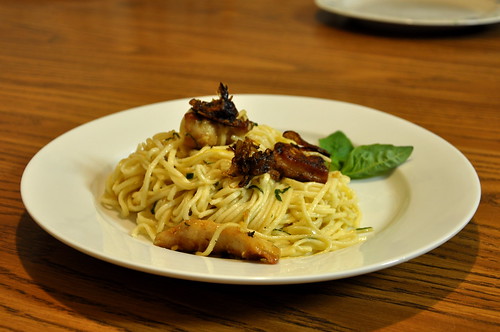
Anyway, put a little butter on your noodles and then pour on a ladle of stew.  Have a glass of red wine and compliment yourself on your delicious stew.  Then, declare it the best you’ve made in a long time, and perhaps your best stew ever.
 
Beef Stew 

Test

This is a test post.  If it works well, exciting things will be on the horizon!

View from Bolton Mountain

Monday, November 02, 2009

Perfect Roast Chickens

Throughout my childhood, Sundays always meant roasted meats. Every now and again, we'd have a pork loin, but usually we had either roast beef or chicken. I'm not roast beef's biggest fan -- I prefer my beef ground and grilled with a slice of cheese on top -- but until recently, I vastly preferred roast beef to roast chicken. Roast chicken was dry, tough, tasteless. The only good thing about it was gravy and the Stove Top usually paired with it. Mom would buy eight pound Purdue oven stuffer roasters and cook the hell out of them. In her defense, it's nearly impossible to properly cook a bird that big. It's the turkey paradox -- by the time the thigh is done, the white meat has the texture of saw dust.

Nowadays, though, I friggen love roasted chicken. I've discovered good quality chickens that are the perfect size for even roasting. I now exclusively buy and roast Murray's or Bell & Evans chickens, with Murray's as my bird of choice. They're a bit more money than Purdue, and for Sunday dinner, one is definitely not big enough for my family, but they are unbeatable when cooked properly. They taste like football and family and love and all that crap. Oh, and they taste like chicken!

I do most of my grocery shopping at King Kullen. They usually sell Murray's chickens for $2.59 per pound. For the three to four pound birds I love, that translates to $8-10. For two birds, the $16-20 yields more than one meal. We don't eat all the meat, and small chickens make the best stock.

DSC_0193.JPG

I don't exclusively buy "organic" or "natural" products. I don't trust these labels. However, I do like the idea of regional (if not local), sustainable, healthy foods that are raised, grown, or otherwise produced without manufactured products (like antibiotics, chemical fertilizers, processed feed, etc.). Murray's is doing this great thing where they label the birds with a code that allows the customer to look up the farm on which the chicken was raised. I think this is kind of cool. I like knowing where my food is coming from.

DSC_0191.JPG

This chicken is from Pennsylvania! It grew up on either the Brubaker Farm in Middleburg, PA or the Wertz Brothers farm in Danville, PA.

Like all Murray's chickens, this one was grown and processed without antibiotics, hormones, growth stimulants, animal by-products, artificial ingredients, or preservatives.

DSC_0192.JPG

Murray's also claims that the birds are humanely raised and handled. There's a lot of information about this on the Humane Farm Animal Care web site. Look for this label if you care about farm animal welfare.

DSC_0195.JPG

For a great Sunday dinner, it's not only important to buy the best chicken, but to cook it the best way. Start by drying it thoroughly with paper towels. Then season aggressively, especially inside the cavity. I used salt, fennel seed, celery seed, poultry seasoning, cayenne, and black pepper. (See the end of this post for amounts).

DSC_0197.JPG

This was a more complex seasoning mix than I usually use. In general, I like salt, fennel seeds, and cayenne pepper. I tried out the celery seed here just because it sounded good, and I used a little poultry seasoning so I have less to throw away. We seem to have purchased excessive amounts of this blend during the 2008 Thanksgiving season. Really, the most important seasoning of all is the salt though. I use about a tablespoon per chicken.

DSC_0201.JPG

I season the outside of the birds evenly and then season the cavity. I probably use two thirds of the seasoning on the inside of the chicken and the remaining third on the outside. I roasted the birds side by side in a V-rack breast side up. My technique has changed now, however. I start the birds breast side down and roast for the first half of cooking that way. If I'm just roasting one bird, I like to put cook it in my 12" cast iron skillet. It's the perfect size. If I care about presentation, I will put a small piece of parchment on the bottom of the pot so the skin does not stick and break. Usually, I don't care though.

Chickens Ready for Roasting

I don't truss the birds. I usually tuck the wings under and put the ends of the drum sticks in slits in the skin at the tail end. The skin shrinks as it cooks and pulls the legs in tight to the body, helping everything cook evenly. It also leaves the cavity open by pulling the skin away. This allows the heat to flow into the cavity so the bird cooks from the outside and inside. I NEVER stuff the bird. No lemon. No garlic. No onions. No herbs. Just dry seasonings.

Chickens Ready for Roasting

I like to roast at 400F. They take around an hour, but I always use my thermometer to cook to 160F. I let the birds rest, but I don't cover them with foil. Then I usually just split the bird at the joints. Don't forget to eat the oysters and the Pope's nose! They are the chef's treats. On rare occasions, I will make gravy, but it usually comes out too salty. I'd rather a perfectly seasoned bird than gravy.

Roast Chicken

Check out that perfectly browned skin!

Roast Chicken


Perfect Roast Chicken Recipe

Adapted from Adam Roberts

INGREDIENTS:
  • 2 3-4 lb chickens
  • 2 tbsp salt
  • 1/2 to 1 tbsp fennel seeds
  • 1/4 to 1/2 tsp cayenne
METHOD:

Remove chicken from refrigerator and allow to come to room temperature (1-2 hours).

Mix salt, fennel seeds, and cayenne pepper. Set aside.

Preheat oven to 400F. Line a roasting pan with parchment. Choose the smallest possible roasting pan that will accommodate both chickens.

Thoroughly dry chickens, inside and out, with paper towels. This will create a crisper skin.

Place the birds in the pan and season the cavities VERY aggressively. You should use about 2/3 of the seasoning mixture. Then, season the breast and wings of the bird, putting more seasoning on areas where the meat is thicker. Flip the birds so they are sitting breast sides down in the pan and season the backs. Focus on the legs and thighs. All your seasoning should be used up.

Roast for about 30 minutes breast side down at 400F. Flip and roast another 15 minutes. Check the temperature of the breast and thigh in EACH bird. They should be 160F. If not, cook another 10-15 minutes and check again. Repeat until the birds are done. If it takes more than 1 hr 20 mins, something is wrong. The birds were not room temperature, or your oven and/or thermometer are broken. You can cut the skin between the thigh and the body and the juices should be clear or just slightly pink. Allow to rest, uncovered, for about 10 minutes. Then carve as you like.

Serves 6-8.

Saturday, August 22, 2009

Lemon Chicken with Pasta

Sliced Shallots
DSC_0089_2
Spaghetti alla Chitarra
DSC_0071_2
DSC_0086_2
DSC_0091_2
DSC_0101_2
DSC_0104_2
DSC_0105_2
DSC_0074_2
DSC_0107_2
DSC_0112_2
DSC_0118_2
DSC_0124_2
DSC_0126_2
Lemon Chicken Plating


Speaks for itself, no?

Tuesday, August 18, 2009

Four Months Without Me, Or, Julie/Julia

So, uhm...it's been a while. What's my excuse for neglecting G//P for, oh, FOUR MONTHS!? This little thing called Life got in the way.

What was that...? OH! I know! It was a shock to me too! I. Have. A. Life. Yup. Been travelin' and attendin' soirees an' practicin' musical instruments and seein' movies. Aren't I all full o' culture?

Speaking of seeing movies, I saw this little film on Friday night called Julie & Julia. Perhaps you've heard of it? [Nice transition, right?] I didn't follow the Julie/Julia Project blog when Julie Powell was writing it. She began on August 25, 2002 and made it through all of Julia Child's recipes in Mastering the Art of French Cooking in one year -- an impressive feat. And she wrote about it. And got a book deal. And a movie. Wow.

So what did I think of the movie?

It was a good, solid movie. Glad I saw it, probably worth the $10 admission, but I don't think I'll be buying it on DVD. It really built Julia Child up to god-like status, which she probably deserves. She was an incredible woman with amazing personality and talents.

Julie Powell was convinced Julia could do no wrong, and Julia was portrayed as such. The movie emphasized Julie a bit more than Julia, but I think that was appropriate [yet not necessarily desirable]. Julie was a needy, whiny brat of a woman, although still somehow likeable. Julia was bold, confident, and awesome, so, well, they were nothing alike. I like how timing was handled -- with Julia's life as she began cooking up to her book deal, and Julie's parallel experience. Both stories end kind of abruptly though. Possible SPOILER: I'm not sure how I feel about the ending. I get it, I really do. And I know that's sort of how the real story ended. But seriously? This movie was not about subtlety, and that's how they end it?! I'll give it 3 out of 5 stars. It was a good food movie, although it really wasn't about the food. I was hoping for more food.

I did take a look at the original blog that Julie Powell wrote, thinking it would be fun to read it through. Not happening. I, without a doubt, HATE it. I have no desire to read through. It's laden with profanity, whining, and political gripes. I NEVER would have followed the project because I just can't stand the real Julie Powell. Kind of unfortunate, really.

Thursday, April 09, 2009

Food & Films 2009: Chili Dip

One of my favorite snack foods, something that begs for a beer and a football game, is chili dip. It is terrifically unhealthy and a bit repulsive if you think about it for more than a few seconds, and would just about kill any natural food junkie. Every now and again though, I break down and eat a few dozen chips' worth. And don't regret it a bit.

Chili Dip!

This photo stinks, and it probably still wouldn't look good even with the best photograph possible, but it's really a delight to devour. The dish has only three ingredients, plus three recommended accoutrements to properly enjoy. Ingredients: cream cheese, a can of chili, and some shredded cheddar. Optional accessories: tortilla chips, football, and beer.

Tackle, Cotton, and I scarfed down the tray you see here in about 5 minutes. This was more or less lunch for us for Food & Films 2009. There really wasn't even time to take a decent shot of the dip fresh from the oven...it was gone that quickly.

My former boss told me she wooed her husband with a similar dish. It involves Fritos, cream cheese, cheddar, Stagg chili, and chopped onion. And is always microwaved, never baked. I'm not sure how the ingredients fit together, but I do know the Fritos are an ingredient, not a dipper.

I urge you to try this dip, or my former boss' variation, the next time you've got a hankerin' for a coronary. You won't be disappointed.


Chili Dip Recipe


INGREDIENTS:
METHOD:

Preheat oven to 375F. Grease a 9" x 13" pan. (I always use a disposable aluminum pan, which I don't spray because I don't have to wash it!) Spread the cream cheese over the entire bottom of the pan. This is tricky if you grease the pan, so make sure the cream cheese is thoroughly softened. Next, spread the chili over the cream cheese in an even layer. Then sprinkle the cheese evenly over the top and place in the oven for around 20 minutes or until bubbly and gently browned. Let cool for about 10 minutes. Serve with tortilla chips. Garnish with herbs if you're trying to impress. Won't matter much after the first taste.

Monday, April 06, 2009

Truly Outrageous Brownies

The best brownies ever are Ina Garten's Outrageous Brownies. They contain pounds of chocolate, and none of it in the form of cocoa powder. If you ever watch the Barefoot Contessa, you could probably guess that they contain plenty of "good" vanilla and coffee, and I really think the coffee makes a big difference. I do find the brownies a bit too sweet, so I cut the sugar slightly. I also melt the chocolate and butter right on the stove, not via double-boiler.

DSC_0141

I added walnuts to this batch, but just sprinkled them on top, rather than mixed them in. They got toasty and crisp, and there was no confusion that the brownies contained nuts.

One important thing about Ina's recipe is that it makes a TON of brownies. She calls for an 18" x 13" x 1.5" pan. I have no such pan, nor have I ever seen one. I've used half-sheet pans in the past with mixed success -- sometimes the brownies spill over. Now, I use two 13" x 9" cake pans, and usually add nuts to one and leave the other alone.


Outrageous Brownies Recipe

INGREDIENTS:
  • 1 pound unsalted butter
  • 1 pound plus 12 ounces semisweet chocolate chips, divided
  • 6 ounces unsweetened chocolate
  • 6 extra-large eggs
  • 3 tablespoons instant coffee powder
  • 2 tablespoons real vanilla extract
  • 1 3/4 cups sugar
  • 1 1/4 cups all-purpose flour, divided (1 cup for batter and 1/4 cup in the chips and nuts)
  • 1 tablespoon baking powder
  • 1 teaspoon kosher salt
  • 3 cups diced walnut pieces
METHOD:

Preheat oven to 350F. Grease and flour two 13" x 9" pans, or one 13" x 18" x1 1/2" sheet pan.

Melt together the butter, 1 pound chocolate chips, and unsweetened chocolate in a large saucepan. Cool slightly. Stir in the eggs, instant coffee, vanilla and sugar.

Stir together 1 cup of the flour, baking powder and salt. Add to chocolate mixture. Toss 12 ounces of chocolate chips with 1/4 cup flour to coat. Then add to the chocolate batter. Divide among the two pans, or put all batter in one larger pan. Top with walnuts.

Bake for about 30 minutes, or until tester just comes out clean. Halfway through the baking, rap the pan against the oven shelf to allow air to escape from between the pan and the brownie dough. Do not over-bake! Cool thoroughly, refrigerate well and cut into squares.

Store leftovers (ha!) in the fridge.

Recipe adapted from Ina Garten's The Barefoot Contessa Cookbook.

Sunday, February 22, 2009

Roast Chicken is the Story

Roast chicken has, over the last several years, become one of my favorite foods. I'm not sure if it's because I've been doing a lot more reading about food -- seems like EVERYONE has something to say about roast chicken and omelettes -- or if I'm just appreciating simpler preparations. Regardless, I frequently find myself searching for an excuse to roast a chicken.

When I was younger, everyday I would ask "what's for dinner?". A couple of meals excited me, a couple disgusted me, but most responses just did nothing for me. Put roast chicken in the third category. My mom would buy big, old Purdue hens. These chickens suffer from the turkey paradox: they're just too big for an even-cooking roast. It's virtually impossible to have perfectly cooked breasts AND thighs. Also, I think Purdue chicken smells. I used to think all chicken, when raw, just kind of stank, but after going through several Murray's and Bell & Evans birds, I know that good quality, fresh chicken, much like fresh seafood, should have no smell at all. It also shouldn't be slimy and ooze its moisture just coming to room temperature. It was not roast chicken that I didn't like, but a certain brand of chicken. Sorry Purdue, I am not a fan.

In my market, Bell & Evans and Murray's chickens never go on sale, but I have found that they cost about the same as Purdue birds when those birds are not on sale. Still, I can get a 3-4 lb quality chicken for about $8-$10 and feed a family of four. Add in some potatoes and vegetables and I'm still well under $20 for the meal. Therefore, when it's up to me, I buy Murray's or Bell & Evans (Murray's slightly preferred -- not sure why!).

I've also recently subscribed to Ina Garten's roast chicken breast technique for all kinds of chicken preparations. The other day, I roasted several bone-in, skin-on chicken breasts for chicken chili and they were great: juicy and tender. I roasted the pieces for 40 minutes at 450F (not convection) with just a little oil, salt, and pepper. A few days later, I roasted some split breasts for my mom for soup -- much better than boiled chicken. Then, I roasted some again for a pasta dish. The chicken turns out with great texture and flavor, although you do lose an opportunity to create flavor via browning. I think that it's worth it anyway.

Thursday, February 12, 2009

Food & Films 2009

January 16, 2009 marked the first annual Food & Films day at G//P headquarters. Tackle was heading back to college on the 19th and we wanted to celebrate the things we love most...both food and films. Planning for the occasion was relatively poor -- as usual. However, it came together nicely. I plan to post details and recipes separately, since there was a lot happening that fateful, frigid Friday (it was 7F, people. Seriously.).

Tackle rolled over to HQ at about 10AM. By that point, I already had a biga going for some rustic white bread. The first order of business was determining how to watch movies AND cook AND eat at the same time. Since we're very smart, we realized we needed to display the films in the kitchen.  This runs contrary to my idealized plan: I'd hoped we'd get everything going on the stove, simmering away, and then slip into the living room to catch a couple of flicks. I don't know if we were overly ambitious or just plain slow, but there was no time to slip away. Instead, we set up Cotton's MacBook and Bose speakers and turned on a very serious film -- My Cousin Vinny.  I decided her screen was too small, so we hooked my Toshiba laptop to the TV in the kitchen. We could see my desktop and windows just fine, but for some reason, the DVD image would not display on the TV. Finally, we just set my computer atop several cases of soda with the nice speakers attached and never looked back.

It was probably about 11AM or so by this point, so we got to work on the cooking. There were three of us -- Cotton, Tackle, and myself (Bizzy stopped by for dinner). Tackle got to work on the bread. I chopped lots of onions and carrots for Cotton and Tackle, and they started cooking. We were working on some braised short ribs and a pork ragu. Those were to be eaten side-by-side at dinner. Some snacks were also in the works to sustain us throughout the day.


In the end, we turned out some homemade bread, homemade tagliatelle, and two different condiments (short ribs and pork ragu) for said tagliatelle. And that was just dinner.  We also deep-fried some frozen poppers, made a chili-cream cheese-cheddar dip, and some pretty amazing Buffalo wings (subscription required) for intra-day nourishment. And did I mention the carnitas and pork rinds? We played My Cousin Vinny and Billy Madison while cooking, and closed the night with a viewing of The Departed and a couple of rounds of Mario Kart on the Wii. It was ridiculously fun and a day I'll never forget. It's awesome cooking and hanging out with Cotton and Tackle (and Bizzy!), doing the things we all love. We gotta do this again next year!

Stayed tuned for more to come on the details of this day.

Monday, February 09, 2009

College Student's Flavor Aider

When you're in college, the food in the cafeteria...well, it kind of sucks. It's bland and tasteless and it needs some livening up. So in my quest for flavor, I came up with a minor solution, at least when it comes to boring sandwiches and bland burgers: a special sauce of sorts that makes campus dining almost tolerable. I liked the sauce so much that when I came home for winter break it was like something was missing from my diet (no, I don't mean the carb-rich selection for digestion). I wanted to try and mimic the sauce for home consumption. For the most part, the sauce is pretty basic. At school, it was simply a mix of Parmesan Peppercorn dressing and Franks Hot Sauce (it sounds a little gross, but is surprisingly delicious). But at home, it got a little more complicated. The ingredients didn't all line up perfectly, so it took some modification but I came up with a suitable substitute.

The first thing I did to produce the sauce at home was to make sure that we had a supply of Frank's Hot Sauce, arguably the most important ingredient because of its distinct flavor, color and spice. Next I had to find the second key ingredient, a suitable dressing. Now, I looked high and low in my local grocery store and I could not find a great parmesan peppercorn dressing that I liked, so I needed to improvise the recipe. I ended up using plain old Cardini's Caeser dressing and some ground black pepper, to taste. However, I found that to be a little thin for a sandwich spread so I added a spoonful of Hellman's Light Mayo and stirred that in with a fork until the mixture was blended completely. I should mention that I normally eyeball the ingredients for this recipe, but I would say that the ratio for the sauce is one part Frank's to two parts salad dressing, and then fresh ground black pepper and mayo to taste. I like the sauce on burgers and on turkey sandwiches, but you can eat it any way you want to.

Enjoy!

Monday, February 02, 2009

Breakthrough

This may seem like a really small thing, but I've perfected cooking rice.  It doesn't involve a special steamer and is not done on the stove top.  Rather, I follow Cook's Illustrated's recipe for oven-baked brown rice [subscription required -- sorry!].  It comes out perfectly fluffy and flavorful and not at all mushy.  I also cooked my steel cut oats using the same technique and it worked great.  I just need to reduce the amount of water from a 4:1 ratio to more like a 3:1 or even 2.5:1.  This will take some tinkering, but the rice alone is a major success.


Photo credits: Mr. Kris

Thursday, January 29, 2009

Snack Food Stadium

I can't resist posting this:


Holy Taco has created a snack food stadium that, upon brief visual inspection, includes guacamole, salsa, queso dip, cheese, sour cream, chex mix, corn chips, cheetos, vienna sausages, bacon and twinkies (for dessert, of course). Did I mention the floating sausage blimp?

Only one more thing to say about this: 24,375 calories.

Photo credits: Holy Taco
Link credits: Serious Eats / Erin Zimmer

Friday, January 23, 2009

A Saucy Dilemma

Although I often try to cook ethnic, traditional, or more gourmet-types of meals, my cooking isn't always all that sophisticated. I like a hot dog every now and again (but don't tell my mother!), and during the week, I eat many simple meals -- perhaps some grilled chicken, brown rice, steamed vegetables. The other day, Dad made a long-simmered tomato sauce (or on Long Island, sawce) and we had it with spaghetti and Italian sausages (sawsages) -- not a terribly complex meal.

I don't think there is anything traditional OR authentic Italian about Dad's tomato sauce (we're German-Eastern European-Scottish-Irish after all), but it's great and we all love it. He sweats onion, carrot, and later garlic. He adds some tomato paste and browns it to a rusty red (this is a key flavor component, I think). If there's meat involved, that's usually browned before the onions sweat, and is usually removed from the pot, but not always. He usually uses some chopped canned plum tomatoes (bought whole, chopped at home) and perhaps some canned sauce, puree, or some other canned product. [Don't turn your snooty snout up at these ingredients. If you buy good quality canned products, you can do just fine working only from the pantry.] My larger point here is that the end product is not always exactly the same, but it is always good.

I always go back and forth on one issue in particular involving our faux-Italian food, and that is whether I prefer a long-simmered and deeply flavored sauce, or a fresh, bright, tomatoey sauce. It's really difficult to choose, but I suppose it comes down to one ingredient: meat. If there's meat involved, I prefer the long-cooked sauce; no meat, and fresh tomato flavor it is!

Photo credits: FotoRita

Wednesday, January 21, 2009

NYT Dining & Wine 01/21/09

Julia Moskin anoints the cellphone as Top Kitchen Toy. She goes through all the uses you'd think she would including photography, list making, unit conversions, and looking up recipes. I'm still not willing to spend $80 a month on something like an iPhone or Blackberry. It just doesn't add that much value to my life. I'm content using my camera to take pictures, my computer or books to look up recipes, my calculator for unit conversions, and...GASP! pen and paper for lists. I can do all of these tasks BETTER with my current tools.

Eric Asimov dicusses South African wines and proclaims the country "one of the greatest sources for moderately priced cabernet sauvignon on the planet today". Asimov and his panel give a $32 bottle four stars (De Trafford Stellenbosch Cabernet Sauvignon 2004) and has several 'Best Value' recommendations (although $32 really isn't all that bad for a great bottle of wine). Fabricant includes a recipe for Lamb Shanks in Red Wine with Prunes.

Bruni reviews a recently renovated Daniel and says of the many touches: "These flourishes make you feel that you’ve slipped into a monarch’s robes, if only for a night, and turn an evening into an event." He gives Boulud's namesake four stars. No surprise there.

This week's Minimalist column includes a recipe for 15-Minute Fried Herb Chicken, using a paste of onion, herbs, tahini, and olive oil to coat the chicken. Sounds great.

Marian Burros provides insight into the Innaugural Luncheon in the Capitol, although the menu and other details are available at the official Innaugural web site.

Finally, although this isn't in the Dining section, I want to briefly mention something Obama said yesterday in his Innaugural Address: "We will harness the sun and the winds and the soil to fuel our cars and run our factories." I'm all for making the most of the sun and the winds (although I'm a little less pro-wind power as it changes weather patterns), but we just shouldn't be using products from the soil for cars and factories. I won't go in to terrible detail here and now -- perhaps I'll explore this issue in a future post -- but let's use our soil for food -- healthy, nutritous food. We don't need more ethanol and we don't need more corn by-products.

Tuesday, January 20, 2009

Ewww...Meatloaf

I used to hate meatloaf.  I think I still do hate traditional meatloaf.  Something about a slab of greasy ground meat...ugh.  But I *do* like turkey meatloaf, as well as interestingly flavored loaves of beef.

And so, a few nights ago, I produced a meatloaf masterpiece.  I combined one pound each of ground beef and ground turkey.  I added a couple of egg whites to cut the fat but bind the meats.  A box of cornbread stuffing took the place of breadcrumbs.  And for the flavorings...well, there were many.

I was looking for chili powder and cumin, but was out.  Instead, I sauteed an onion in low sodium taco seasoning. 

Sauteed Onions for the Meatloaf

I added the onions to the meatloaf along with one chipotle in adobo, a 4 oz can of green chiles, and half a can of enchilada sauce. 

Ew.  Meatloaf Ingredients.

Mixing the Meatloaf

Mixing the Meatloaf

I should point out that those are NOT my hands.  Last time I checked, I don't have man hands (or a wedding ring indentation).  Dad mixed for me so I could take some photos.

Finished Meatloaf

The other half of the can of enchilada sauce was reserved for the top of the loaf.  (Ironically, Meatloaf is playing in iTunes at this very minute!)

The verdict: good, but a little too Sandra Lee / Rachael Ray for me.  I prefer to use more natural ingredients (seriously -- stuffing?  TACO SEASONING?!).  I suppose that's my next step.  But I made a meatloaf I actually enjoyed eating, and that's a bit of an accomplishment.

Wednesday, January 14, 2009

NYT Dining & Wine 01/14/09

Today's New York Times Dining & Wine section just didn't interest me all that much. Bit of a disappointment, really.

The one article I truly enjoyed though was Harold McGee's wine science piece. In it, McGee discusses gadgets and techniques for making wine taste better, from frothing to dipping a penny in your glass. I'm no wine snob, but it just seems wrong to mess with wine like that.

I refer you to Serious Eats for a great roundup of today's Dining & Wine section.

Pierre Herme's Emotion Wasabi et Pamplemousse

Pierre Herme has created a sort of wasabi-grapefruit parfait. Really interesting idea. He begins with a wasabi gelee, followed by some fresh grapefruit and grapefruit confit, then a layer of marscapone and wasabi creme angalaise, topped with pistachios.

The video is entirely in French, but watch it anyway. I understood quite a bit and I haven't spoken French in years.

Thanks to Clotilde for the link

Saturday, January 10, 2009

Congratulations!

I just want to take a minute to congratulate two of my favorite blog authors -- perhaps my two MOST favorite. Yeah, superlatives aren't my strength.

Adam Roberts, the Amateur Gourmet, has been writing his funny, informative blog for five years now. I've been reading for most of that time and his posts really make me happy and want to get in the kitchen or eat something great. That's all I could ever hope for my readers (if I had some), so I hope Adam is happy with that as well. Great job, Adam!

Gina Trapani of Lifehacker is moving on to pursue some other things. She's a really inspiring person for lots of reasons and I wish her well. Not sure what her next project is, but this will be a huge loss for Lifehacker. I read religiously and I'm confident the other editors and contributors can maintain the high standards Gina had in place. Best of luck, Gina!

My French Press Procedure

For Christmas, I got Tackle a 17 oz Bodum Brazil French Press - the same pot I use on a daily basis in my office. I also gifted him some Biggby coffee, arguably my favorite coffee.

However, I suppose I left out a few essential items, as well as instructions. Granted, the instructions would produce coffee the way I like it, but having consumed much joe with Tackle, I think I have a good idea of his tastes.

I think the most important aspect of a great cup of coffee is the coffee itself. That means good, fresh beans. In a perfect world, I'd use whole beans, grind them immediately before combining with water, and that would be that. However, since I do most of my brewing at work, grinding daily is out of the question. Also, I don't have a burr grinder, nor the purse to get one, and I really think that's the only way to grind beans for French Press coffee. Therefore, I leave it to the experts and buy coarse-ground coffee from quality suppliers -- Fairway or Biggby. Both roast their own beans and the brews made from them taste great. I make sure to store ground coffee in airtight containers. Opaque is ideal, but I just keep the coffee in the dark under my desk where it's relatively cool. I also buy less more often, rather than more less often. Coffee is one thing that should not be bought in bulk.

When it comes to daily brewing, I have a bit of a ritual. I begin by filling my Brita Pitcher with cool tap water. Good water is key, especially when your only ingredients are coffee and water. I fill my electric kettle with 0.5 liters of filtered water and flip the switch. If I was less lazy and didn't mind making an even bigger production in the office, I'd fill my mug up with hot tap water. However, since I have the somewhat disgusting habit of washing my mug the morning after drinking the coffee, it's already warm from washing.

Anyhow, I wait for my kettle to reach a boil, then click off. I've read many times that the water should be 190-200F, not 212F, so I wait until the kettle clicks off, then add my coffee to the pot. For one mug, I use 2.5 scoops of coarse ground coffee. How big is a scoop? I think about 1 tablespoon. The scoop came with my press. By this time, I think the water should be around 200F. I add all of the water and stir with a chopstick. Then, I let the coffee steep for 2-3 minutes. I press the filter down slowly and decant into my mug immediately. When I use my larger press at home, I make sure not to leave any "extra" coffee in the pot. It will continue to brew and will taste bitter and disgusting. It should be put in a thermos, or never made in the first place.

I always drink my French Press coffee black because I think it has excellent flavor and body without dairy or sugar. However, even if you *need* milk and/or sugar, I strongly urge you to try a French Press. It's not that much more work, effort, or time than any other method and has great results.

One final note: I just want to emphasize the importance of an even, coarse grind on the beans. They must be even in size so extraction is done evenly. It must be coarse so the grinds don't clog or go through the filter.

Photo credits: maggiejumps

Wednesday, January 07, 2009

NYT Dining & Wine 01/07/09

There are a couple of interesting articles in today's New York Times Dining & Wine section (published every Wednesday).

Julia Moskin's article "From Asia, Rapture in a Bowl" discusses the enthusiasm people have for various Southeast Asian noodle soups. They all sound tasty, especially as I sit here and sniffle. Unfortunately, there are no recipes included with the article.

Mark Bittman, the Minimalist, gives some pointers for a great pantry, and I don't think I disagree with anything he says (although I'm not throwing out all our spices and bread crumbs). However, a few things really resonated with me:


OUT Canned beans (except in emergencies).

IN Dried beans. More economical, better tasting, space saving and available in far more varieties. Cook a pound once a week and you’ll always have them around (you can freeze small amounts in their cooking liquid, or water, indefinitely). If you’re not sold, try this: soak and cook a pound of white beans. Take some and finish with fresh chopped sage, garlic and good olive oil. Purée another cup or so with a boiled potato and lots of garlic. Mix some with a bit of cooking liquid, and add a can of tomatoes; some chopped celery, carrots and onions; cooked pasta; and cheese and call it pasta fagiole or minestrone. If there are any left, mix them with a can of olive-oil-packed tuna or sardines. And that’s just white beans.

All of those applications make my mouth water. I'll have to try to think ahead and cook up some beans!

OUT Minute Rice or boil-in-a-bag grains.

IN Genuine grains. Critical; as many different types as you have space for. Short grain rice — for risotto, paella, just good cooked rice — of course. Barley, pearled or not; a super rice alternative, with any kind of gravy, reduction sauce, pan drippings, what have you. Ground corn for polenta, grits, cornbread or thickener (whisk some — not much — into a soup and see what happens). Quinoa — people can’t believe how flavorful this is until they try it. Bulgur, which is ready in maybe 10 minutes (it requires only steeping), and everyone likes. If you’re in doubt about how to cook any of these, combine them with abundant salted water and cook as you would pasta, then drain when tender; you can’t go far wrong.

I hate boil-in-bag rice. I'd also like to try to incorporate some different grains into my diet.

Bittman also recommends pureeing some walnuts with garlic, oil, and water as a pasta sauce or condiment for vegetables or grains. That sounds absolutely delicious and slightly healthier than some other pantry-backed dishes like bacon parmigiana.

Florence Fabricant has an excellent looking recipe for duck fried rice. She also has a short write-up about Dousoeur de Paris Patisserie Salon, which sounds about as authentic as any patisserie in the US could hope to be.

Tuesday, January 06, 2009

At the Stove, a Dash of Science, a Pinch of Folklore

Today's New York Times Science section has an article by Kenneth Chang about food science. He made a few dishes and allowed biochemist, cook, and author Shirley Corriher to critique his practices from adding sugar to stir fry to soaking fish in rice wine for a few minutes. Chang also consults food scientist Harold McGee and Sichuan food expert Fuchsia Dunlop.

Monday, January 05, 2009

French Press: Attempt #2

Tonight, I decided to attempt another french pressed cup o' joe. I took Pepper's suggestions and put them in action. The final product was much stronger, but I put a little too much milk and sugar in (surprise surprise) so I didn't get the full flavor. I also forgot to stir when I added the water, so I'm sure it might have been even better had I remembered to stir.


Next time I will hopefully remember to stir and put a little less milk and sugar. I'll get it perfect one of these days!

Skinny Chicken Marsala

So today was the first day of dieting in the Onufrey house. Dad is doing a contest similar to the television show, The Biggest Loser, and the rest of us decided it was time to drop a few pounds. Because of this, it is time to start experimenting with some lower calorie recipes.


When I awoke this morning I saw that there was chicken to be made for dinner. I initially thought of making grilled chicken, but that's just way too ordinary in this house and will probably be made later in the week. After a little thinking, I decided on a somewhat healthier version of Chicken Marsala. It's quick, easy, and tasty, so why not?

To make this delicious concoction, I first minced up some shallots and garlic and set them aside. I then filleted some boneless, skinless chicken breasts nice and thin. After that, I seasoned them up with salt, pepper, garlic powder, and some Essence of Emeril. (In the normal version I probably would have dredged the cutlets in some seasoned flower.) The cutlets were fried in some olive oil and then removed from the pan.

For the sauce, I added the shallots and garlic to the pan. After about 30 seconds, I added some sliced baby portobello mushrooms and a very small amount of butter. After a few minutes, I deglazed the pan with some marsala wine and added a little sugar and parsley. A couple teaspoons of dijon mustard was also added. This may seem weird, but I remembered it from a chicken marsala recipe I once made. When the sauce was reduced, the chicken was returned to the pan to heat through. The chicken was served with a nice garden salad (lettuce, cucumbers, carrots, red bell pepper, and celery) and some roasted vegetables (zucchini, onion, bell pepper, and carrots.)

This lower calorie version of chicken marsala was delicious. It really wasn't much different from its higher calorie and fat cousin. All the major flavors were there and it was still satisfying. This will definitely be made again very soon.

First Solo French Press Escapade

So I decided to finally use the present my best good friend/cousin Pepper got me for Christmas. Thats right, I finally broke out the french press and coffee. This is my favorite way to make and drink coffee, so needless to say I was excited to use it.


To make my delicious evening beverage, I followed the instructions given to me by Pepper, as well as those contained in the box. First, I added about a tablespoon and a half of coarse ground coffee to the press. I then poured in about a cup of hot, but not boiling, water. I put the lid on and let it brew for about three and a half minutes, as instructed. When the time was up, I slowly pressed the coffee and poured it. I put a little milk and sugar in and I was ready to enjoy.

The coffee was great, as always, but it could have been a little stronger. Even my dad said it was a little weak, and he doesn't really like strong coffee. Next time I will be sure to add some more coffee, perhaps even two tablespoons, but most likely just short of that. I look forward to experimenting with my french press and figuring out the best blend. There's nothing better than a nice, hot, french pressed cup o' joe!

P.S. It went great with a cannoli from Iavarone!

Sunday, January 04, 2009

Suggested Improvements to Death in a Pan

As with any good dish, there is always room for improvement. One such improvement would be with the bacon roast. Perhaps it would be a good idea to cook the bacon a little bit first before weaving it together. This might help it stay together a little better.


As for the carbonara, there isn't much to improve on. It was rich, creamy, and cheesy. It wasn't exactly what you would call traditional, but it was damn good and maybe even better. This was my very first time both making and eating carbonara, and I was not disappointed. In the future it could be lightened up by adding less eggs, cheese, and bacon drippings. It could also be made even less healthy with more eggs and even some heavy cream.

All in all it was a great dish that should be made and consumed with caution. Eat at your own risk with this one folks. 

Saturday, January 03, 2009

Death in a Pan with a Side of Pasta

So there we were, in our usual spots in the living room, faced with the quotidian question of "What's for dinner?" As usual, Cotton suggested Zorn's (yeah, not happening). The usual suspects had already been consumed in the prior days of the week (Mexican, Chinese, you get the point). As a result of this, there was a craving for delicious pasta in the air.

Cotton and I went downstairs, past the Dolorean's bedroom, and into the pantry to investigate possible ingredients. There was an ample supply of pasta and some tomato products, but I really wasn't feeling a dish with tomatoes.

I brought the pasta upstairs and said "Pepper, now what?" She suggested a carbonara, and asked if there was any bacon in the house. In fact, there was some right in the refrigerator. I also encountered some mozzarella cheese right next to the bacon, and suggested that we use that too.

So, cheese, bacon, and a previous viewing of a bacon cheese roll translated into our first annual bacon roast (or bacon parmagiana as I fondly refer to it) as a tribute to the Epiphany. (Everyone does that don't they?)

Our bacon roast started off like a lattice topping for a pie and then lightly fried in a pan.


Bacon Lattice

We removed it and filled it with about half a pound of the cheese (literally.) We then rolled it, toothpicked it shut, and placed it in a small foil lined roasting pan.

Rolling the Bacon Roast

Bacon Roast: Pre-Oven

We roasted it in the oven at 450F until it was brown and bubbly.

Bacon Parmigiana

Bacon Roast: Post-Oven

Meanwhile, we boiled the pasta and fried up some garlic slices in the bacon grease. After the pasta cooked for about four minutes it was drained and added to the pan with the garlic and drippings. The egg whites and parmasean were then added and tossed with the pasta.

Spaghetti Carbonara Before Egg Yolks

After about two minutes, six egg yolks were added and tossed in (off the heat) until they were cooked and a nice sauce was formed. The bacon roast was carved and served atop the carbonara with, you guessed it, more parmasean.

Spaghetti Carbonara

Needless to say, this was delicious and took about ten years off of our lives. However, it was soooo worth it. I look forward to next year's bacon roast adventure.

Recipe adapted from The Paupered Chef